How To Make Nailstickers Last Longer And Reusable | My New Year’s Eve Nails

Hi sparkles!

Today I will be showing you my new year’s eve nails, how to make nailstickers last longer and how to make them reusable because some nailstickers are gorgeous but they can get a little expensive for only 1 use in my opinion. So let’s begin!
Vandaag laat ik jullie mijn nieuwjaarsnagels zien, hoe je nagelstickers langer kan gebruiken en hoe je ze herbruikbaar kan maken. Want sommige nagelstickers zijn heel erg mooi, maar ze kunnen nogal aan de dure kant zijn om maar 1 maal te gebruiken. Laten we beginnen!

What you will need:
– Nailstickers of your choice (mine are the Stickers and Stones by Essie)
– Stick on nails with separate adhesive tabs
– A nail polish that matches the nailstickers (unless your stick on nails have the same color, I ended up mixing Essie’s Bobbing for Baubles with a light grey)
– A file 
Wat je nodig hebt:
– Nagelstickers die jij leuk vindt (ik gebruikte de Stickers and Stones van Essie)
– Valse nagels met aparte stickers waar je ze mee aanbrengt
– Een nagellak met dezelfde kleur als je nagelstickers (tenzij de valse nagels al dezelfde kleur hebben, ik heb uiteindelijk Essie’s Bobbing for Baubles gemixt met een licht grijze lak)
– Een vijl


First thing you want to do is measure which stick on nails you will need and measure which sticker you need for every nail. Next up, apply the nailstickers onto the fake nails like you would on your own nails. 
Het eerste dat je moet doen is de juiste maten valse nagels klaarleggen en de nagelstickers uitzoeken die het beste op deze nagels passen. Daarna breng je de nagelstickers aan op de valse nagels, net zoals je dat op je echte nagels zou doen.


Now you’ll see that the stickers won’t fit perfectly. To solve this, just paint over the edges with the nail polish that matches the stickers. Don’t forget to do the back of the nails to, as you can see below. Since stick on nails are usually longer than your own nails, the red will be visible if you don’t cover this up with nail polish. (Don’t paint the whole back of the nail though, the adhesive might let go faster when it’s on nail polish)
Nu zal je zien dat de stickers niet perfect passen. Om dit op te lossen, lak je de randen die nog zichtbaar zijn met de lak die overeenkomt met de kleur van de stickers. Vergeet niet om ook de achterkant van de nagels te doen, want meestal zijn de nagels te lang en zal het rode dus nog zichtbaar blijven als je dat niet doet. (Lak niet de volledige achterkant, de lijmsticker zou te snel los kunnen laten)


This is what you’ll end up with. Lastly you just want to fold the edges of the sticker over and file them of, like the instructions of the stickers will probably tell as well.
Dit is tot nu toe het resultaat. Het enige wat je nu nog moet doen is de nagelstickers over de randen plooien en het overschot wegvijlen, zoals waarschijnlijk ook in de instructies van de nagelstickers staat.


Your result: Reusable nailstickers! Remember it is important to use fake nails that have separate nail adhesives. This way you can pull the adhesives of the nails when you remove them and use new adhesives the next time.
Resultaat: Herbruikbare nagelstickers! Onthou dat het belangrijk is dat je valse nagels gebruikt met aparte ‘lijm pads’. Hierdoor kan je wanneer je de nagels verwijderd hebt, de lijm makkelijk van de valse nagels verwijderen en de volgende keer gewoon nieuwe lijmstickers gebruiken.

Stick these on your nails following the instructions and you’re done! Let me know what your think! ^^ 
Breng de valse nagels aan zoals op de instructies vermeld staat en je bent klaar! Laat me weten wat je ervan vindt! ^^ 

What are your new year’s eve nails looking like? ^^
Hoe zien jouw nieuwjaarsnagels eruit? ^^
xoxo 
Sweet. Sparkly. Serendipity. 
Romina

.post h1 small{ display: block!important; font-size: 14px!important; font-weight:normal!important; }

My Christmas Nails 2013 ❄️ #BigBlogmasProject Day 24

Hi beauts!

I’ve had a bunch of nail stickers laying around for a while now. I almost forget about them but todays I saw them and remembered I ordered these from ebay for Christmas time, just in time! So I decided to do my nails and show you guys what they look like for the holidays. ^^
Ik heb al tijdje een hele hoop nagel stickers en was bij vergeten dat ik ze had maar vandaag zag ik ze weer liggen en herinnerde ik me dat ik deze voor kerst had besteld, juist op tijd! Dus ik besloot ze vandaag te gebruiken en jullie te tonen hoe mijn nagels er voor kerst uitzien. ^^

When I saw these on ebay, I just had to have them. They are super inexpensive and I think nail stickers always come in handy if you’re in a rush and still have to do your nails. You can simple stick them on, press down, fold the edges over and file of the excess. 
Toen ik deze op ebay zag, moest ik ze gewoon hebben. Ze zijn enorme goedkoop en ik vind nagel stickers altijd wel handig voor als je eens geen tijd hebt om je nagels te doen. Je kan deze dan simpelweg op je nagels kleven, omvouwen en het overschot wegvijlen.


These were only $0,99 which is insane and I got them from this seller: unlimited_zone (there were tons of different designs). I didn’t expect them to be of great quality but I thought I would give them a go anyway since I didn’t have to loose much.
Deze kostten maar $0,99 wat echt spotgoedkoop is en ik kocht van deze verkoper op ebay: unlimited_zone (er zijn nog enorm veel andere designs). Ik verwachtte niet veel van de kwaliteit maar ik wou ze toch eens proberen, want veel had ik niet te verliezen.


As you might be able to tell from the pictures, they do wrinkle a little but not as much as the ones I reviewed from Essence, which I’m happy about because those were awful! For $0,99 I can totally deal with those tiny wrinkles because they aren’t even that bad. You can only tell when you’re looking very close, but no one will be able to tell from a distance.
Zoals je misschien op de foto’s kan zien, kreuken ze wel een beetje, maar lang niet zo erg als die van Essence die ik onlangs reviewde, dus daar ben ik al heel blij mee want die waren verschrikkelijk! Voor $0,99 vind ik die kreukjes persoonlijk helemaal niet zo erg omdat ze ook echt niet opvallen. Je kan het enkel zien als je van heel dichtbij kijkt, maar niemand zal het van op een afstand kunnen zien.


I’m pretty impressed with these so far. Now I can only hope they stay on for a decent amount of time. I will definitely order some more on ebay, just because they are so incredibly cheap and easy.
Tot nu toe ben ik hier redelijk van onder de indruk. Nu kan ik enkel nog hopen dat ze ook lang blijven zitten. Ik ga er zeker nog meer bestellen op ebay, omdat ze zo goedkoop en zo makkelijk zijn.

xoxo 
Sweet. Sparkly. Serendipity. 

Review | Essence Metal Glam Nail Stickers 03 Glam-Me ❄️ #BigBlogmasProject Day 9

Hi dolls!
I’m back with a little review. I think this is going to be a quick one because this is a hit or miss situation for me.
Hier ben ik weer met een review. Ik denk dat dit een korte zal worden aangezien het een “hit or miss” was voor mij.


When I first saw these nail stickers by Essence’s Metal Glam Limited Edition, I was in love. Rose gold is just irresistable for me, so I had to pick them up. I wanted to try them as soon as possible, so I did and today I will show you how they looked and held up.

Toen ik deze nagelstickers van de Metal Glam Limited Edition van Essence voor het eerst zag, wou ik ze onmiddellijk. Rosé goud vind ik gewoon zo mooi dat ik het net kon laten liggen. Ik wou ze zo snel mogelijk uitproberen, dus dat deed ik en vandaag laat ik jullie zien hoe ze eruit zagen en hoe ze het deden.

I’m going to be honest, these sucked! I have nothing possitive to say about them except for the color. I would have loved to wear these, but as you can see they’re rinkly all over the nails. I couldn’t keep them on because they were just straight up annoying. I did one hand, and pulled them off straight after.
Ik ga hier heel eerlijk over zijn, deze waren ronduit slecht! Ik heb er niets goeds over te zeggen, behalve dan de kleur. Ik zou deze echt heel graag gedragen hebben, maar zoals je kan zien op de foto zijn ze volledig gekreukt op mijn nagels. Ik kon ze echt niet ophouden want ze irriteerden mij enorm. Ik heb er 1 hang volledig mee gedaan, maar heb ze er gelijk ook weer afgetrokken. 
To avoid any confusion: I did know how to apply these kinds of nail stickers and I read the instructions completely. There’s no way I did something wrong in my opinion, they just don’t work. I think the reason is that these aren’t as elastic as the other ones I have tried, so they can’t ‘hug’ the nail like the other ones do.
Om verwarring te vermijden: Ik wist wel degelijk hoe ik dit soort stickers moest aanbrengen en ik heb de instructies goed gelezen. Ik heb het dus niet verkeerd gedaan, ze werken gewoon niet. Ik denk dat het ligt aan het feit dat deze niet elastisch genoeg zijn in vergelijking met de andere die ik al geprobeerd heb, dus ze kunnen niet mooi vlak op de nagel liggen.
That’s it for today. Sorry for the negative review, but as you know, I’m always honest about any product I try.
Dat was het weer voor vandaag. Sorry voor de negatieve review, maar zoals jullie weten ben ik altijd eerlijk over de producten die ik test.

xoxo 
Sweet. Sparkly. Serendipity. 

Review | imPRESS press-on manicure

Hi lovelies! 

Today I will be reviewing the imPRESS press-on manicure nails. I was hoping to post this as late as possible because that would mean they held up well, so let’s see how they did!
Vandaag zal ik de ImPRESS press-on manicure nagels voor jullie reviewen. Ik hoopte dit zo lang mogelijk uit te stellen want dat zou betekenen dat ze lang erop bleven, dus laten we even gaan kijken hoe ze waren!


I’ve heard a lot of good and bad things about these nails. Bunny or grav3yardgirl on youtube is one of the people that really likes them and it’s because of her that I really wanted to try them out! There are plenty of other designs, but I decided to go with the plain brown ones for fall.
Ik had veel goede en slechte dingen over deze nagels gehoord. Bunny of Grav3yardgirl op youtube is één van de personen die ze echt leuk vind en daarom wou ik ze zelf ook eens proberen! Er zijn veel verschillende designs, maar ik ben voor de gewone bruine gegaan voor de herfst.

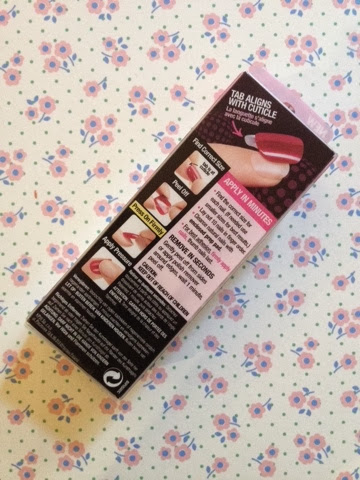
The instructions are very clear as you can see on the back of the packaging.
De instructies zijn heel duidelijk zoals je op de achterkant van de verpakking kan zien.


1. Lay out the sizes you will need for your nails.
1. Leg de maten die je nodig zal hebben klaar.

2. Prep your nails by cleaning them with the provided prep pad.
2. Maak je nagels schoon met het voorziene doekje. 


3. Take of the little plastic and stick the nails onto your nails. This is the result.
3. Trek het plastiek eraf en plak de nagels op. Dit is het resultaat.


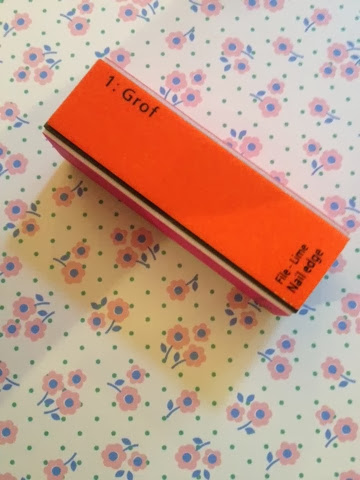
It doesn’t say anything about filing, but I noticed the nails had those ridges at the ends that get cought behing everything and scratch a lot. So I decided to file them a little with this buffer (this wasn’t included!).
De instructies zeggen niets over vijlen, maar ik merkte dat de nagels scherpe randjes hadden die overal zouden achter blijven hangen. Dus ik besloot deze weg te vijlen met deze buffer (deze zat niet in de set!).


After I did all this, these were the nails I had left. Quite a lot but unfortunalely to big for my nails. 
Nadat ik dit alles gedaan had, waren dit de nagels die overbleven. Vrij veel maar jammer genoeg te groot voor mijn nagels.


Now on to the review! I applied them monday evening (23/09). They had plenty of time to ‘dry’ or set on my nails during the night. When I woke up, they were all still looking perfect. I got ready for my first class and noticed that they were almost moving when I put some pressure on the edges of the nails. But they stayed in place. The day after, they didn’t do that anymore, as if they where finally completely set. 
Nu op naar het review! Ik heb ze maandagavond (23/09) opgedaan. Ze hebben gedurende de nacht genoeg tijd gehad op te ‘drogen’. Ik heb mijn de volgende dag klaargemaakt voor mijn eerste les en merkte dat ze bijna bewogen als ik wat druk op de randen uitoefende, maar ze bleven wel zitten. De dag erna deden ze dat niet meer, alsof ze toen eindelijk volledig vast zaten.

The rest of the week they held up great! I didn’t have to be careful or anything. I didn’t lose any nails, but on monday (30/03) one of them cracked a little. It wasn’t really noticeable at all and they were still looking perfect but I was getting sick of the color so I decided to remove them. :p You could see that they were lifting a tiny bit, but I think I could have left them on for at least another 4 days without any nails falling off or anything.
De rest van de week bleven ze heel goed zitten! Ik moest ook helemaal niet voorzichtig zijn. Ik heb geen enkele nagels verloren maar maandag (30/09) barstte eentje een beetje. Je kon het nauwelijks zien en ze zagen er nog steeds perfect uit maar ik was de kleur een beetje beu aan het worden dus ik besliste ze eraf te halen. :p Je kon zien dat ze een beetje omhoog begonnen te komen, maar ik denk dat ik ze er zeker nog 4 dagen op had kunnen laten zitten zonder dat er een nagel loskwam.

The removal proces is supposed to be very easy. You should be able to lift the sides and of not, you should use some polish remover on the sides to loosen them. They were still pretty stuck to my nails so I dipped al of my nails in some nail polish remover. After that they where still holding up, but I decided to try and peel them off. It was harder than you would expect from press-on nails, which is why they did damage my nails a little, BUT that could just be because my nails where already damaged!
Het verwijderen van de nagels zou heel gemakkelijk moeten zijn. Je zou de zijkanten moeten kunnen liften en als dat niet lukt zou je de zijkanten kunnen lossen met wat nagellak remover. Ze zaten nog steeds heel erg vast op mijn nagels, dus ik heb ze even in nagellak remover gedompeld. Nadat ik dat gedaan had zaten ze nog steeds goed vast, maar ik besloot ze eraf te trekken. Het was moeilijker dan je zou verwachten van press-on nagels, wat ook de reden is dat ze mijn nagels een klein beetje beschadigd hebben, MAAR dat kan ook zijn omdat mijn nagels al een beetje beschadigd waren!

Overall, I would repurchase these nails! They are definitely worth the €10,99 in my opinion! I would recommend to apply them to healthy nails. It’s really convenient for on a holiday if you don’t want to do anything about your nails and want them to look good for one or even two whole weeks! The little nail polish bottle they come in makes it easy to cary them with you! Just keep in mind to be careful the first day and they will be perfect for along time! 
In het algemeen zou ik deze nagels zeker opnieuw kopen! Ze zijn zeker de €10,99 waar naar mijn mening! Ik zou ze wel aanbrengen om onbeschadigde nagels. Het is zeer gemakkelijk voor op vakantie, als je niets wil doen aan je nagels en toch wilt dat ze 1 of 2 weken er goed uitzien! Het klein nagellak potje waar ze in verkocht worden maakt het ook makkelijk om ze met je mee te nemen! Hou gewoon in gedachten dat je de eerste dag voorzicht moet zijn en dan zullen ze er heel lang perfect uitzien!

Thanks for reading! ^^
Dankjewel om te lezen! ^^

What is your favorite nail product?
Wat is jou favoriete nagelproduct? 

xoxo 
Sweet. Sparkly. Serendipity.

Mini Haul! Mini Shoplog!

If you follow me on Instagram or Twitter, you might already know that I went shopping as a study break. I posted a picture of what I bought and I thought it might be fun to show more specific what I got. I didn’t get a lot at all since I was just taking a break from studying so I only went to one store for a few minutes. The store I went to was Kruidvat, which only exist in Belgium and the Netherlands, but most of the products I bought can be found in any drugstore.
Als je mij op Instagram of Twitter volgt, weet je misschien al dat ik als pauze tijdens het studeren even ben gaan shoppen. Ik postte een foto van wat ik gekocht had en dacht dat het misschien wel leuk zou zijn om meer in detail te laten zien wat ik gekocht heb. Ik heb niet veel gekocht want ik nam gewoon een pauze dus ik ben maar heel even naar één winkel geweest. De winkel waar ik naartoe ging was het Kruidvat, dat enkel in België en Nederland bestaat, maar de meeste producten die ik kost zijn in alle drogisterijen te koop.

Click on the images to enlarge!
Klik op de afbeeldingen om te vergroten!


The first things I got were 2 Essence eyeshadows. I heard from Emma from The Image Partner that the Essence metallic effect eyeshadow in “party all night” looked a lot like the Mac eyeshadow in Satin Taupe, so I decided to get it because it looked really good on her. (1.69€)
Het eerste dat ik kocht waren 2 oogschaduws van Essence. Ik hoorde van Emma van The Image Partner dat de Essence metallic effect eyeshadow in “party all night” heel erg op de Mac oogshaduw in Satin Taupe lijkt, dus daarom besloot ik het ook te kopen omdat hij heel mooi was bij haar. (1.69€)

The second color I chose was the Essence shimmer effect eyeshadow in “greyhound”. I chose this one because it was half off and just because I didn’t really have a color like this. Both these eyeshadow contain 2.5 grams, which is pretty good I think. (0.85€)
Als tweede kleurtje koos ik voor de Essence shimmer effect eyeshadow in “greyhound”. Deze koos ik omdat hij nog maar de helft van de prijs kostte en omdat ik niet echt zo’n kleur heb. Beide oogschaduws bevatten 2.5 gram, wat vrij goed is volgens mij. (0.85€)

To continue with Essence, I also bought to makeup brushes. The first one is the  Essence eyeshadow brush which is just a flat shader brush. The second one is the Essence smokey eyes brush. (Both 1.39€)
Om binnen Essence the blijven, ik heb ook 2 make-up kwastjes gekocht. Het eerste is de Essence eyeshadow brush, een gewoon plat kwastje. Als tweede kocht ik ook de Essence smokey eyes brush. (Beide 1.39€)
The last thing I bought from Essence was the colour & go nailpolish in “naughty and pink!”. This polish is a basic hot pink and contains 8 ml. (1.69€)
Als laatste Essence product kocht ik nog een colour & go nagellakje in “naughty and pink!”. Dit nagellakje is een hot pink en bevat 8 ml. (1.69€)


Next I also bought a nailpolish from the Catrice limited edition Glamazona collection in the color “I’m A Survivor”, a red-ish color. (2.99€)
Daarnaast kocht ik ook nog een nagellakje van de limited edition Glamazona collectie van Catrice in “I’m A Survivor”, een roodachtige kleur. (2.99€)

The next thing I bought were these nail stickers, just because they were super cheap and I wanted to try them out. (1.99€)
Het volgende dat ik kocht ware deze nagelstickers, gewoon omdat ze super goedkoop waren en ik wou ze eens testen. (1.99€)


The last two things I bought were just two things I needed: a new eyelash curler, and this one actually comes with a refill thingy so that’s nice, and some nail clippers because I recently heard that filing your nails actually is bad for your nails and clipping is supposed to be better. (2.29€ and 1.29€)
De laatste twee dingen die ik kocht zijn gewoon twee dingen die ik nodig had: een nieuwe wimperkruller, en bij deze zat zo’n extra kussentje dus dat vond ik wel tof, en een nagelknipper omdat ik onlangs hoorde dat vijlen eigenlijk niet goed is voor je nagels en dat knippen beter zou zijn. (2.29€ en 1.29€)

That’s all for today! Thanks for reading and if you want to see any of these products in another post (review, tutorial, anything) just let me know! ^^
Dat was het voor vandaag! Dankjewel om te lezen en als je één van deze producten in een andere post wil zien (review, tutorial, eender wat), laat het maar weten! ^^

xoxo
Sweet. Sparkly. Serendipity.


.post h1 small{ display: block!important; font-size: 14px!important; font-weight:normal!important; }